How to Patch and Repair a Hole in Drywall
Is your textured ceiling sagging? Our skilled team can fix it and prevent future issues - call us now!
Drywall is an essential part of any home, providing smooth and durable walls. But no matter how careful you are, accidents happen. Maybe you moved a piece of furniture too quickly, or your kids got a little too enthusiastic while playing indoors. Whatever the cause, a hole in your drywall can be an eyesore. The good news? It’s fixable! If you’re looking for drywall repair in Vancouver, this guide will walk you through the process step by step, from small holes to large damages, and help you decide whether to go the DIY route or call in a professional.
DIY Drywall Repair vs Professional Drywall Repair in Vancouver
Not all drywall damage is created equal. While some repairs are perfect for a DIY weekend project, others are best handled by professionals especially if you want a flawless finish.
DIY drywall repair is ideal when:
- The hole is small (nail holes, dents, hairline cracks)
- No electrical wiring or plumbing is involved
- The wall texture is smooth or easy to match
- You have time for drying, sanding, and repainting
Professional drywall repair in Vancouver is recommended when:
- The hole is larger than 6 inches
- There is water damage or mold
- The wall has textured finishes (orange peel or knockdown)
- You want fast, dust-free, perfectly blended results
In many Vancouver homes, especially older properties, professional drywall repair ensures the wall looks untouched saving time, frustration, and repeated fixes.
Also Read:
The Anatomy of Drywall Damage
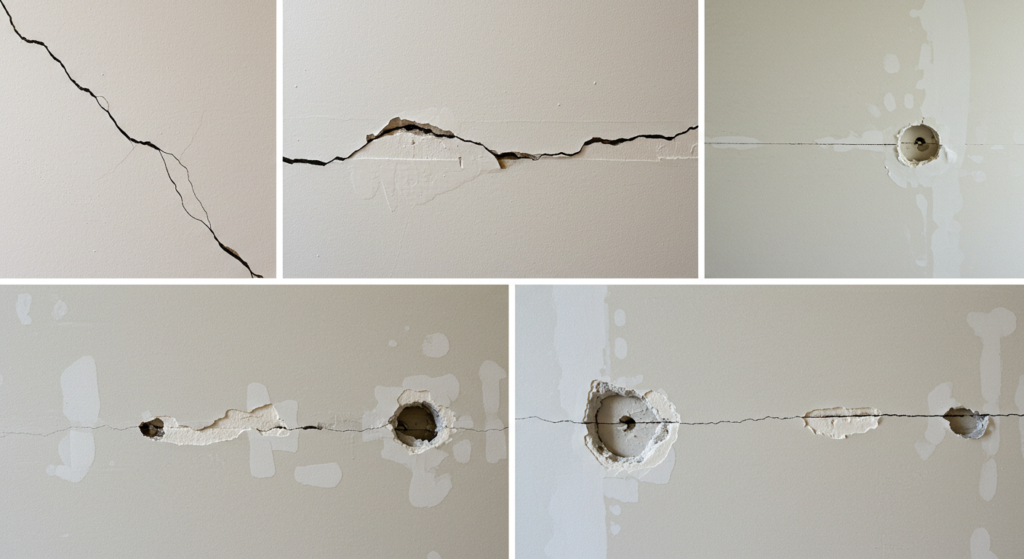
Before you start fixing the hole, it’s important to understand what you’re dealing with. Drywall damage comes in different forms, and the repair method depends on the size and severity of the problem.
- Tiny nail holes and dents: These are the easiest to repair. A little spackle, some sanding, and a fresh coat of paint will make them disappear.
- Small to medium-sized holes (1-6 inches): These require a patch, joint compound, and a bit of patience.
- Large holes (over 6 inches): These need a more complex fix involving support backing, drywall tape, and compound layering to create a seamless finish.
Tools & Materials Checklist for Drywall Repair
Before starting any drywall repair, having the right tools makes the job easier and ensures a professional-looking finish.
Basic Tools & Materials You’ll Need:
- Putty knife (4” and 6”)
- Joint compound or spackling paste
- Drywall tape (paper or mesh)
- Mesh drywall patch (for small holes)
- Utility knife
- Sandpaper (120–220 grit)
- Drywall screws
- Drill or screwdriver
- Primer
- Matching wall paint
- Clean cloth or sponge
For Larger Repairs:
- Drywall saw
- Replacement drywall piece
- Wooden backing strips (1×3 boards)
- Stud finder
Having everything ready before you begin prevents rushed work and uneven results.
How to Repair Drywall Damage
Imagine this: You’re hosting a gathering at your home, and someone accidentally pushes a chair too hard against the wall, creating an unsightly hole. Panic sets in. Should you cover it with a picture frame? Or is there a better way to fix it? The answer is simple repairing drywall is a straightforward process if you follow the right steps.
Fix Small Drywall Cracks
Small cracks in drywall usually occur due to temperature changes, humidity fluctuations, or the natural settling of a house. These cracks can be unsightly, but they are relatively easy to fix using joint compound.
- Prepare the Crack: Use a utility knife to slightly widen the crack. This helps remove loose debris and allows the joint compound to adhere better. Cleaning the area ensures a long-lasting repair.
- Apply Joint Compound: Take a putty knife and spread a thin layer of joint compound over the crack. If the crack is wider than expected, apply drywall tape to reinforce the area before adding another layer of compound.
- Build Up the Layers: Let the first layer dry completely before applying additional layers. Each layer should extend slightly beyond the previous one to ensure a smooth transition.
- Sand and Smooth: Once the final layer dries, use fine-grit sandpaper (120–150 grit) to sand the surface until it blends seamlessly with the surrounding drywall.
- Prime and Paint: Since drywall compound absorbs paint differently than drywall, applying a primer ensures even coverage before painting over the repaired area.
Repair Drywall Nail Holes
Nail holes are a common issue, especially after removing picture frames, shelves, or decorations. These small imperfections may seem minor, but they can make walls look uneven and messy. Fixing nail holes is one of the simplest drywall repairs.
- Clean the Hole: Wipe the hole with a damp cloth to remove dust and debris. A clean surface allows for better adhesion of the repair material.
- Fill with Spackling Paste: Use a putty knife to press a small amount of spackling paste or lightweight joint compound into the hole. Make sure it is completely filled.
- Smooth It Out: Scrape off the excess material using the putty knife, ensuring the surface remains flush with the wall.
- Let It Dry: Allow the filler to dry completely as per the manufacturer’s instructions.
- Sand the Area: Once dry, lightly sand the patch until it is perfectly smooth.
- Prime and Paint: Apply a primer to prevent the patched area from absorbing too much paint, then repaint the wall to match.
Fixing Popped Nail Heads in Drywall
If you’re noticing popped nail heads in your drywall, you’re not alone. This common issue happens when nails pull away from the wall studs, creating visible bumps or small holes in the surface. To fix this:
- Use a drywall screw to secure the drywall back to the stud, about an inch above or below the popped nail.
- Tap the old nail back in and cover both holes with spackle or joint compound.
- Once the compound is dry, sand the area smooth, wipe off the dust, and paint over the repair.
How Long Does Drywall Repair Take?
Drywall repair time depends on the size of the damage and how many layers of joint compound are required.
Typical Drywall Repair Timelines:
- Nail holes or small dents: 30–60 minutes
- Small holes (1–6 inches): 1–2 hours (plus drying time)
- Large holes (over 6 inches): 3–5 hours over 1–2 days
- Drying time between coats: 12–24 hours per layer
Professional drywall repair services in Vancouver, BC can often complete the job faster using quick-dry compounds and professional sanding tools.
How Much Does Drywall Repair Cost in Vancouver?
Cost is one of the most common questions homeowners ask. While DIY repairs are cheaper upfront, professional repairs often provide better long-term value.
Estimated Drywall Repair Costs in Vancouver:
- Nail hole or small patch: $100 – $150
- Medium hole repair: $150 – $300
- Large drywall hole repair: $400+
- Water-damaged drywall: Varies based on severity
Prices may vary depending on wall texture, accessibility, and repainting needs. Hiring professionals ensures proper blending, texture matching, and durability.
How to Patch Small Drywall Holes (1-6 Inches)
Now, let’s say your teenage son was practicing his baseball swing inside the house, and a wild swing sent the ball straight through the wall. You’re left with a hole the size of a fist—too big for a simple spackle fix but not quite large enough to require a full panel replacement. They can still be repaired easily using a drywall patch:
- Clean the Area: Remove any loose drywall or debris around the hole. If the edges of the hole are rough, use a utility knife to smooth them out.
- Apply a Self-Adhesive Patch: Place a mesh drywall patch over the hole. If you don’t have a patch, cut a piece of drywall slightly larger than the hole and attach it with joint compound.
- Cover with Joint Compound: Use a putty knife to spread joint compound over the patch, feathering the edges to blend into the surrounding wall.
- Let It Dry and Sand: Once the compound is dry, sand it smooth with fine-grit sandpaper to create a seamless surface.
- Prime and Paint: Apply primer before painting to ensure an even finish.
How to Fix Large Drywall Holes (Over 6 Inches)
Now, let’s talk about the big one—the type of damage that makes your heart sink. Maybe someone accidentally put their foot through the wall while moving furniture, or a plumbing repair left a gaping hole in your drywall. Large holes require more effort, but they’re still completely fixable with the right approach. This type of repair involves cutting out the damaged drywall and replacing it with a new piece:
- Mark and Cut the Damaged Area: Using a pencil and a straightedge, outline a square or rectangular shape around the damaged section. Use a drywall saw to cut along these lines, creating a clean opening.
- Install Support Strips: If the hole is large, you’ll need wooden support strips (such as 1×3-inch boards) behind the drywall to provide stability. Secure them with screws.
- Attach the Drywall Patch: Cut a new drywall piece to fit the hole and screw it into the wooden supports. Ensure that the edges are flush with the existing wall.
- Apply Drywall Tape: Cover the seams with drywall tape to prevent cracks from forming in the future.
- Spread Joint Compound: Apply a layer of joint compound, feathering it out from the seams. Let it dry before adding additional coats.
- Sand and Smooth: Once completely dry, sand the area to blend the patch with the surrounding wall.
- Prime and Paint: Apply primer before painting over the repaired section for a flawless finish.
Safety Precautions Before Cutting Drywall
Before you cut into drywall, it’s important to check for electrical wires and wall studs behind the surface. Use a stud finder to locate the studs and mark them clearly. Always turn off the power supply to the area to avoid any accidents involving live wires.
Safety & PPE for Drywall Repair
Drywall repair creates dust and debris that can irritate your eyes, lungs, and skin. Taking proper safety precautions is essential.
Recommended Safety Equipment:
- Dust mask or respirator
- Safety glasses
- Work gloves
- Long sleeves to protect skin
- Proper ventilation (open windows or use a fan)
Additional Safety Tips:
- Always turn off power before cutting drywall
- Use a stud finder to avoid wires and pipes
- Clean dust thoroughly before painting
Protecting yourself ensures a safer and more comfortable repair process.
Cut Out Damaged Area
When drywall is severely damaged—whether due to water damage, mold, or deep cracks—you may need to cut out the affected section and replace it with new drywall. This process ensures that the structural integrity of the wall remains intact.
- Mark the Area to Be Removed: Use a straightedge and a pencil to outline the section of drywall that needs to be cut out.
- Cut Out the Damaged Section: Use a drywall saw to remove the affected portion. If the damage is near a stud, try to cut along the edges of the stud for easier attachment of new drywall.
- Insert Support if Necessary: If the opening is large, install wooden backing strips inside the hole using screws. These will help hold the new drywall securely.
- Install New Drywall: Cut a piece of new drywall to fit the opening and screw it into place.
- Tape the Seams: Apply drywall tape over the joints to prevent future cracks.
- Apply Joint Compound: Spread thin layers of joint compound over the tape and seams, allowing each layer to dry before sanding.
- Sand, Prime, and Paint: Once the repair is smooth, apply primer and paint to match the wall.
Creating a Clean Opening for Repair
For a sturdy repair, cut a square or rectangular hole around the damaged area. Try to align your cuts with the center of the studs so the new drywall patch has proper support. If no studs are available, insert support strips or wood cleats behind the wall for stability.
Finishing the Patch Like a Pro
Once the patch is secured, apply joint compound over the seams and screw heads using a putty knife. Let it dry completely, then sand the surface smooth. Wipe off any dust, apply primer, and then finish with matching wall paint for a flawless repair.
How to Match Drywall Texture After Repair
One of the hardest parts of drywall repair is making the patch invisible especially on textured walls.
Common Drywall Textures in Vancouver Homes:
- Smooth finish
- Orange peel texture
- Knockdown texture
Tips for Texture Matching:
- Apply joint compound using the same motion as the existing texture
- Use a sponge, roller, or texture spray for orange peel
- Practice on cardboard before applying to the wall
- Lightly sand between attempts for better blending
If the texture doesn’t match, the repair will remain noticeable even after painting. This is one of the main reasons homeowners choose professional drywall repair services.
Common Drywall Repair Issues
Even with careful application, there are a few common issues you might run into when performing drywall repair:
1. Drywall Cracks
Cracks in drywall often appear due to the natural settling of a home. They usually show up around door frames or ceilings. To fix a crack, widen it slightly with a utility knife before applying joint compound. Then, embed drywall tape over the crack and smooth another layer of compound on top. Once dry, sand and paint over the area.
2. Poor Blending
One of the biggest concerns with drywall repair is making sure the patch blends seamlessly with the rest of the wall. The key to a smooth finish is feathering the joint compound outward in thin, even layers. Sanding between layers and using primer before painting also helps create an invisible repair.
3. Mismatched Paint
Have you ever patched a hole, painted over it, and then realized the color doesn’t match? This is a common problem, especially if the surrounding paint has faded over time. To avoid this, use the same paint type and apply primer before painting. If possible, paint the entire wall to ensure a uniform look.
Read More:
When to Call a Professional for Drywall Repair in Vancouver
Many Vancouver homeowners, especially in older homes, prefer professional drywall repair to ensure seamless texture matching and long-term durability. While minor repairs are manageable as a DIY project, some situations call for expert intervention. If you’re dealing with a large hole, structural damage, or a complex repair job, professional drywall repair services can save you time and ensure a flawless finish.
If you search for drywall repair near me, you’ll find plenty of experts in Vancouver who can help. Hiring professionals means you won’t have to worry about matching textures, dealing with uneven patches, or repainting multiple times. They also have the right tools and experience to handle any drywall repair efficiently.
Final Thoughts
Drywall damage is inevitable, but fixing it doesn’t have to be stressful. Whether it’s a tiny hole from a nail, a medium-sized dent from an accident, or a large gaping hole from a plumbing job, knowing how to perform drywall patch repair can save you money and keep your home looking pristine.
However, if you’re looking for a quick, professional, and stress-free solution, Lynn Valley Drywall offers expert repair services that ensure a flawless result every time. So, the next time you find a hole in your wall, don’t panic just grab your tools for a DIY fix or call us for professional help, and your drywall will be good as new in no time!